

Tuesday, November 27, 2012
2013 PLANS
--------------------
CAMPAIGNS
1) Finish Cycle #1 of the SYW.
2) Commence Cycle #2 of the SYW. We start over.
--------------------
SYW PAINTING PLANS
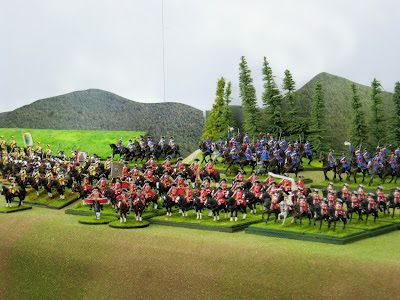
1) Saxon Prinz Xavier Bn. (60) Lovely Eureka 28mms.
2) Saxon 6 Pdr. artillery sections.
3) Saxon von Schill Hussars (12)
4) Saxon command officers.
5) Add third Saxon Leibkürassier Squadron (12).
6) Add to Lady Diana Pettygree's Hussars. (Hinterland Miniatures)
7) The Eureka music ensemble.
8) Finish Bercheney Hussars dismounted sections, combatants and horse holders.
--------------------
TABLETOP GAMES
1) Goal = TEN.
2) New blog stories/personalities.
--------------------
CONTEMPLATIONS (Perhaps - Perhaps Not)
1) Trial balloon to stockpile combatants for India.
2) 2013 SYW Assn weekend in South Bend?
a) Naval descent on an island.
b) Finish Cycle #1
--------------------
A fine thing on paper, eh? Your remarks are welcome below.
Cheers,
Bill

Thursday, November 1, 2012
WHAT'S GOING ON WITH YOU GUYS?
WHAT'S GOING ON BILL, JIM, RANDY, ET AL?
Change of pace, time-out, hiatus, reset, resting or pause?
Yes all that.
What's Next Then?
--------------------We are finishing seven years in real time doing Seven Years' War-games so we can start another seven year span of games.
Specifically we are finishing Cycle I with 4-5 last games. One was fought in East Prussia on 21 July, 2012. See: http://campaignsingermania.blogspot.com/2012/07/battle-in-1762-east-prussia.html
A second occurs in Silesia on 1 December 2012. The next three games will occur through the Spring of 2013 in Central Germany near Bohemia, then Westphalia and last possibly in Canada. Afterwards we'll decide who won the SYW, allowing one point for each win. Something like that. So far it's 1 point for Russia/Austria/France and 0 for Prussia and Great Britain. Should we have a party?
Cycle II will restart the SYW possibly using Murat Campaign System Maps, carrying casualties forward with reinforcements and so forth. It will be a super easy system.
--------------------
In 2012 we played many different kinds of games. Most are listed off to the left of this screen. Scroll down a bit.
In my case I also completed the amazing Colonial Adventure Photo Story, Expedition To Alexandrapour on the General Pettygree blog. See the last chapter, Buried Alive, here: http://generalpettygree.blogspot.com/2012/10/chapter-xxii-buried-alive.html
Plus I have a new six month old grandson and puppy. Here is the Rocket's October photo at five months old.

In the immediate future we are preparing for a Napoleonic game in Iberia on 10 November. Jim and I are painting new British for it. Our Napoleonic blog is here: http://barnapoleon.blogspot.com/ Take a look.
After the November game I will be painting SYW Saxon cavalry for the 1 December game.
Randy has been painting and raising Colonials for our Mafrican Continent and doing amazingly well. Jim is painting feverishly and keeping his exquisite Fife and Drum Miniatures Company progressing prodigiously. See: http://fifedrumminis.blogspot.com/
----------
CLOSING REMARKS
1. Look for new stories, vignettes, personalities and intersting images in the coming year. See you again sometime in December, if not sooner.
2. Just thought some of you might like to know what's going on.
3. Thank you very much for looking in. We sincerely appreciate your interest. Your remarks as always are welcome below.
--------------------
Wednesday, September 19, 2012
To The Coa River Bridge Part 2
For this story Der Alte Fritz (Jim P.) and I are moving our Napoleonic game activities to the blog Campaigns In Iberia.
The story To The Coa River Bridge Part 1 posted on 7 September concludes here:
http://barnapoleon.blogspot.com/2012/09/campaigns-in-iberia-solves-problem-part.html
------------------------------------
The story To The Coa River Bridge Part 1 posted on 7 September concludes here:
http://barnapoleon.blogspot.com/2012/09/campaigns-in-iberia-solves-problem-part.html
------------------------------------
Thursday, September 6, 2012
To The River Coa Bridge #1
CAMPAIGNS IN IBERIA
SOLVES A PROBLEM
----------------------------------------SOLVES A PROBLEM
Date: 25 August, 1810/2012
Location: Between Almeida and the Coa River Bridge
Rules: Batailles de l'Ancien Régime {BAR} adapted to Napoleonics
Situation: An outnumbered British force at first stands to fight and then must scramble to the Coa River Bridge to escape.
------------------------------------
TACTICAL ORDERS AND COURIERS
There is a problem but not like you might think.
When gaming pards become highly skilled in deployment, maneuver and rules, it becomes harder to surprise each other. Unforeseen and entertaining blows become fewer and fewer because both sides have become nearly evenly matched. Parries are frequent. We know each other too well.
There is a problem but not like you might think.
When gaming pards become highly skilled in deployment, maneuver and rules, it becomes harder to surprise each other. Unforeseen and entertaining blows become fewer and fewer because both sides have become nearly evenly matched. Parries are frequent. We know each other too well.
One more thing and this is BIG. As players we tower above the tabletop seeing everything. It therefore becomes even easier to counter enemy plans. Legerdemain almost entirely vanishes. Players on one side often huddle to change plans, move reserves or do just about anything to impossibly stop the foe in unrealistic moments.
The solution is to introduce Tactical Orders and Couriers. What does this entail?
1. Each player is given a mission such as take the hill, use refused wing tactics, swing wide right, hold the village area, etc. These are Tactical Orders. Obey them.
2. Each player is represented by a miniature officer. You as that miniature officer will honorably make decisions only about what that little fellow can actually see or be told down on the table.
3. Each player will have couriers to send orders, information, ask for help, etc. It is important couriers are well-mounted and skillful riders simulated by double or treble light cavalry open order speeds. Thus, if centrally placed commanding General Alexander perched atop a high hill can actually see a dangerous enemy move on a flank, he can write a message, fold and place it under a courier and send off the galloper to the reserve to order a static regiment to the flank to help. The officer receiving the message can react the turn after receipt.
Let's see how this was reflected in the following game.
Let's see how this was reflected in the following game.
THE BEGINNING
Stand quietly boys and do your duty.
The French are coming.

Two kilometers to the left of the quiet Coa River Bridge is the Fortress of Almeida. Between the two we played a fun, stimulating and companionable 1:10 Napoleonic game in Iberia. This bridge was British extreme right flank.

Meanwhile near Almeida French line infantry and chasseurs a cheval busily approach the British extreme left flank held by riflemen.

The same riflemen view the French advance.

Deeper inside the left flank is Der Alte's new 94th Regt.
Note distant riflemen of the previous two images.

Center: Major General Pettygree, staff,
more riflemen and the 9th Regiment.


A later view of the same rifles and the 9th Regt.

Better view of the 9th. Regt.

British Horse Artillery Battery on the unopposed right flank.
This would soon change.

The Coa River Bridge on the extreme right flank.
Captain Magoo's 5th Foot Grenadier Company
guards the bridge.
The End Of The Beginning
In the beginning French forces were not allowed to deploy opposite the British right flank. They instead deployed opposite the British left and center. Reasons were because French numbers nearly doubled those of their foe. The British did not need the French appearing everywhere! Plus, the French were not initially posted there historically. That soon changed.
 As Polish Lancers shockingly arrived to disrupt a supply train heading for the bridge. The bridge is to the upper right of the image less than two feet away.


They were followed by two squadrons of French dragoons making for the bridge. You can just see a corner of the bridge in the upper right of the photo.


One squadron then turned to canter up and over the bridge. Would the other squadron follow and burst through Captain Magoo's unsupported Grenadier Company? Afterwards would the French dismount closing the British escape route?
Now Back To The Problem And Our Solution


Here's the thing. As Bill, I knew French regiments of cavalry were heading for the British right flank on Turn 2. I could have shifted the artillery and Paget's cavalry earlier than turns 3 and 4. I did not because the officers on the table had to discern what was happening from their perspective an inch above the table, a courier needed dispatching and recipients needed time to react. Thus, real world reasonable delays were built into my response.

Come back next time to see what happened!
Closing Remarks:
1) Some of the information for our scenario was personally provided by Charles Grant, "from his next publication, Wargaming in History - Peninsular Actions - which will be out well before Chritsmas." Jim and I sincerely thank him for our adaptation of his Coa Bridge scenario. We like this scenario so much we plan do it again in two months. Seven players are needed for our version.
2) See: http://www.napoleon-series.org/military/virtual/almeida/c_almeida.html for information about The Fortress of Ameida and its geographical and tactical importance in the region by Robert Burnham.
2) See: http://www.napoleon-series.org/military/virtual/almeida/c_almeida.html for information about The Fortress of Ameida and its geographical and tactical importance in the region by Robert Burnham.
3) Most miniatures are Elite Miniatures: http://www.eliteminiatures.co.uk/products.htm Others are from Peter Gilder's Connoisseur available from Bicorne Miniatures: http://www.bicorne.net/catalog/index.php?cPath=292_102&osCsid=8cb021725bf323ebc47d14d244f1449d
4) The bridge is from Miniature Building Authority: http://miniaturebuildingauthority.com/index.asp
5) Your remarks are very welcome at "Comments" below.
----------
Tuesday, August 14, 2012
The Bridge
Date: 14 August 1762/2012
Situation: French Retreat - Allied Pursuit
Or: Testing A Future Scenario
----------
 The French needed to retreat to this bridge, cross and retreat off the field on the road in the right of the image. A battle rages near the top of the image beyond the large trees.
 The only sensible way across the river would be to use the bridge. The river is shallow but is supposed to be stricken with many rocks. Assuming the French reach the bridge, some should cross on the bridge while others form a rear guard to cover that retreat. Crossing through the water was not allowed especially because both banks are supposed to be very steep.
 French Left Flank and Center: De Saxe Lanciers in the upper left engaged Prussian hussars, lost and were routed. Regiment Berry anchors the left flank. On it's right is Regiment La Sarre. The French infantry are atop a long ridge.
 The French Left Flank was pressed hard by two enemy battalions and two squadrons of Prussian hussars. Above is Regiment Berry.
It is possible to just obtain an idea of the valley separating the two sides. Using a terrain mat such as sold by The Terrain Guy accomplishes this effect. Gamers can place all kinds of things underneath....

French Left Flank: Berry and La Sarre surged forward but were unable to break the Hessian Isenburg Battalion. Both retreated. During the retreat Berry was lost.

 The Allies press the French Left Flank hard.
 Todd's British 60th Regiment of Foot with two 6 Pounders were coming on fast and there was no way to stop them. Time for the French to leave.
 French allies maneuvered around to keep open the way to the bridge. Shown are two squadrons of Saxon von Brühl Dragoons doing this. In the upper left is Prussian Regiment von Bungle having a hard time with French Regiment Royal Roussillon. Both suffered terrible casualties. However, we agreed von Bungle had one more turn before destruction or rout. Two ranks faced Royal Roussillon whilst the third about faced to shoot at the the Saxons. Chuck actually turned around the third rank to do this. Easy to do when miniatures are individually based.
Closing Remarks:
1) We started the game at 7:30pm finishing at 9:40pm.
2) Todd B. and Chuck L. opposed yours truly in a fun, friendly and stimulating engagement. Not all our games are large.
3) Had one more turn been played, the way to the bridge would have been opened.
4) See http://oldregimerules.com/ for information about the rules Batailles de l'Ancien Régime 1749-1763 {BAR}.
5) Your considered remarks are entirely sought and welcome.
----------
Situation: French Retreat - Allied Pursuit
Or: Testing A Future Scenario
----------
THE BRIDGE
Our local group is fortunate to be able to participate in a variety of games after work on Tuesday or Wednesday evenings. On the 14 of August we played a Seven Years' War Batailles de l'Ancien Régime 1740-1763 (BAR) game using three battalions, two light guns and three squadrons per side. Numerical differences were minor.
The scenario was suggested by Der Alte (Jim P.) In a way the game below was a test of a Napoleonic battle occurring on 25 August.


It is possible to just obtain an idea of the valley separating the two sides. Using a terrain mat such as sold by The Terrain Guy accomplishes this effect. Gamers can place all kinds of things underneath....

To achieve slopes and heights as shown above. Easy!
French Left Flank: Berry and La Sarre surged forward but were unable to break the Hessian Isenburg Battalion. Both retreated. During the retreat Berry was lost.

French Center: La Sarre atop a ridge.


Closing Remarks:
1) We started the game at 7:30pm finishing at 9:40pm.
2) Todd B. and Chuck L. opposed yours truly in a fun, friendly and stimulating engagement. Not all our games are large.
3) Had one more turn been played, the way to the bridge would have been opened.
4) See http://oldregimerules.com/ for information about the rules Batailles de l'Ancien Régime 1749-1763 {BAR}.
5) Your considered remarks are entirely sought and welcome.
----------
Tuesday, July 24, 2012
BATTLE IN 1762 EAST PRUSSIA
Date: 21 July 1762/2012 Game
Location East Prussia Near Danzig
Situation: Last Battle In The East
Specifically: Encounter Battle
----------
See a very good AAR by Michael M. with briefly captioned photographs dated 24 July 2012 here: http://www.campaignsinminiature.blogspot.com/
Our group has been fighting the Seven Years' War since about 2005-2006; nearly seven years. Der Alte recently proposed restarting another seven year cycle enhanced with some super-easy campaign concepts such as casualties being carried forward.
Agreeing I proposed finishing up with one game each in East Prussia, Silesia, Middle Europe (Bohemia, Saxony or Thuringia), Westphalia and Canada. At the end we'll review the results and see how each nation ends the conflict. We expect to end cycle #1 in the first quarter of 2013.
Rules: Batailles de l'Ancien Régime 1740-1763 {BAR}
See: http://oldregimerules.com/ for information about BAR.
------------------------------

 This fordable stream in the middle of The Main Table separated the two flanks. The two flanks played at their own speed.
A Terrain Guy table mat allows placement of books, towels, blankets, hills, boards, etc. underneath so the top surface has undulations plus taller/broader hills than we usually have. See: http://theterrainguy.com/gamemats.html


 My red-coated French Gendarmes pretending to be Russians on the Western Flank Back Table. They would soon cross to The Main Table, interpenetrate a Russian battery, become disorganized and yet surge forward into the Prussian Brummer Battery causing it to fire and evade. Intervening Prussian heavy horse stopped the surge but whilst hand to hand lasted, the Prussian attack was stalled. Eventually the red-coats were defeated and fell back.
 Seated left to right: John M. (IL), Don D. (WI), Earl K. (IL), Brent O. (MN) and Randy F. (IL). Standing left to right: Der Alte Fritz Jim P. (IL), John B. (WI), Michael M. (WI), Todd B. (WI), Keith L. (IL), Curt B. (WI), Todd P. (WI) and yours truly Bill P. (WI).
IL = Illinois, MN = Minnesota and WI = Wisconsin
--------------------
Location East Prussia Near Danzig
Situation: Last Battle In The East
Specifically: Encounter Battle
----------
See a very good AAR by Michael M. with briefly captioned photographs dated 24 July 2012 here: http://www.campaignsinminiature.blogspot.com/
Preamble
Agreeing I proposed finishing up with one game each in East Prussia, Silesia, Middle Europe (Bohemia, Saxony or Thuringia), Westphalia and Canada. At the end we'll review the results and see how each nation ends the conflict. We expect to end cycle #1 in the first quarter of 2013.
Rules: Batailles de l'Ancien Régime 1740-1763 {BAR}
See: http://oldregimerules.com/ for information about BAR.
------------------------------

Foreground: Western Flank. Background: Eastern Flank.
Prussians will arrive from the left; Russians from the right.
Main Table: 6'x26' with Back Tables 2.5'x26'.
Formerly this was an around the wall model railroad layout.

A Terrain Guy table mat allows placement of books, towels, blankets, hills, boards, etc. underneath so the top surface has undulations plus taller/broader hills than we usually have. See: http://theterrainguy.com/gamemats.html

Prussian players at start.
Mission: Force the Russians out of East Prussia.

Russian players at start minus yours truly taking the photo.
Mission: Maintain a hold in East Prussia for the negotiation table.
----------
Photos below are solely from the Western Flank.

Prussians flood onto the Western Flank.

The mighty Prussian Army!

Prussian Heavy Battery of 12 Pdr. Brummers.

Prussians are crossing to the Russian table edge.


IL = Illinois, MN = Minnesota and WI = Wisconsin
--------------------
NEW DISPATCH -- DATED 25 July, 1762/2012
GERMANIAN (PRUSSIAN) WAR MINISTRY AAR
Der Alte Fritz (Jim P.)
The Prussian Ministry of War would like to correct some of the misinformation gleaned in the Russian AAR. [See http://www.campaignsinminiature.blogspot.com/ posted 24 July 2012 by Michael M.]
“The Prussians had "roughly" (our spies weren't totally effective) fifteen battalions of guards, grenadiers, elites, jägers and the occasional ordinary musketeer unit.”
I think that our efforts at subterfuge and misinformation have succeeded beyond our wildest dreams as the Russian commander is of the impression that our forces were stronger than they actually were. Creating fear and doubt in your opponent’s mind is winning half the battle before it even begins.
*********
On the Prussian left (Russian right), Lt. General von Frye had 7 infantry battalions, 5 sqds of cuirassiers, 5 sqds of dragoons and I think four 3-pdr battalion guns. With regard to the infantry in that sector, there were 5 musketeer btns, 1 elite Jager btn, and one undersized unit of Wedell Grenadiers (48 figures instead of the usual 60 figures). So clearly the majority of infantry were common veteran musketeers. The jagers earned their “elite” status in previous battles by doing many heroic things on the Field of Mars. Their elite status was somewhat offset by the fact that they were not allowed to be “formed infantry”. A simple bayonet charge would have wiped them off the face of the earth.
On the Prussian right (Russian left), Der Alte Fritz collected the cream of his army in one sector so as to deliver a decisive attack on the Russian left and hopefully swing around and outflank the strong Russian position on the high ground in the other sector of the table. We had no intention of attacking a Russian army, armed to the teeth with cannon, perched atop a steep hill. So we intentionally made our left sector weaker than our right sector. This seems to have turned out well for the Russians as our left was defeated in totality.
So here we had 8 battalions that included 2 x grenadier btns and 1 x elite musketeer btn (status earned in prior battles) and 5 veteran musketeer battalions. We elected to place all of our field guns in this sector. Note that in the rules, guards/grenadiers receive the same +1 bonus for firing and that guard and grenadier status are NOT CUMULATIVE (i.e. a guard grenadier btn only gets a +1 bonus). There was also one reserve battalion of the Prussian Lieb Garde that was held in reserve and did not participate in the battles. Admittedly, this was an elite unit and a guard/grenadier unit so it would have had a +2 bonus on its firing. As already noted, the King did not permit his Garde to participate in the battle.
At the end of the day, however, the cannon makes no distinction between guards, grenadiers, musketeers or the lowliest of low quality troops of any kind. They all die the same way. Since I like to attack and be the aggressor more often than not, when you face me across the table, there is a high liklihood that my sector will have more, if not all, of the better quality troops within my army. I am only emulating King Frederick in that regard.
*********
All that aside, it was a well-played game by all participants and I have to admit that around the lunch hour, I was certain that the Prussian attack on the right was going to get crushed. There was one key cavalry melee that we had to win, or else the Russian/French cavalry could have swept around our flank totally unopposed. Fortunately for Prussia, we did win that melee and slowly the cavalry tide shifted in the Prussians’ favor. I would also add that for most of the game, the Prussians had a long string of unfavorable card draws on the right (Russian left). I would say that 9 out of 10 times, the Prussians drew the first movement card and the second firing card. Thus the Russians always got to react to our moves AND get the devastating first fire on many a turn. Towards the end of the game, the laws of probability kicked in (in that most of the red cards in the deck had already been drawn) and we started getting a lot of black cards for the first fire card drawing.
My assessment of the battle is that it was a crushing Russian victory on our left and a hang-on-for-dear-life Prussian win on our right, thus averting total anihilation of the Prussian army. On a strategic level, the battle would be an overall Russian win as the King’s army would most likely have retreated to a strong defensive position after the battle in order to keep the whole army intact.
Your servant,
Count Schadenfreude
Minister of War, Kingdom of Germania
Concluding Remarks:
Prussia won the Western Flank. Russian won the Eastern Flank. Result: Draw but at the Peace Table in Paris (theoretically in 1763/2013) Russia can claim she has forces in East Prussia. Advantage: Russia.
The blue four page Quick Reference Chart (one sheet of paper folded over) in the previous image was consulted 95% of the time to resolve turns and look things up. Page 4 is a drill manual and rarely used. The main rule book {BAR} was consulted perhaps twice. The game commenced at about 10:30am and concluded at 4:25pm with a half hour plus for lunch. The East Flank finished at 2:30pm. Approximately 2,000 miniatures were deployed.
Are the rules {BAR} only for BIG battalions? No. Twenty-four man battalions work just fine. We simply want the feel and look of larger formations and we are extremely fortunate to have three home venues in which to game in our group with large tables in our basements.
Do you need a giant table? No.
Will 15mm miniatures work with BAR? Yes. There is second set of Quick Reference Charts for 15mms and/or for more average sized tables. Movement rates and weapon ranges are shortened.
Do you have to use three ranks? No. Suggested minimum is two for the look.
You can do all this too with variations mentioned above.
The next game will occur in Silesia.
Comments welcome below. Thank you for looking in.
--------------------
Thursday, May 24, 2012
Part 3: The Battle of Costa Blanca (The End)
Date: 12 May 1808/2012
Location: Costa Blanca, Iberia
Situation: Game #2 French Army Arrives
The previous posting described portions of Game #1, a reconnaissance game. See:
http://campaignsingermania.blogspot.com/2012/05/part-2-battle-of-costa-blanca.html
----------
General Paget commanded the red coat left flank. His mission was to delay the French advance for as long as possible and later fall back to Costa Blanca or to the northwest.


 Closest to the bottom of the image the toll begins to rise on the nearest French battalion; it's volitgeurs were felled to a man. The Royal Marines (to the right of the image not shown. See previous photo) in particular suffered terribly from French skirmisher fire.
 Except for the Portuguese Rifles who retire to a wooded ridge on the left flank all British forces retreated and were lucky to get away.
General Paget did have one hand to play. During the above action, his 15th Hussars managed to ride from the extreme left, (on a Side Table) then turn right and penetrate deeply into the French rear. He hoped this would discombobulate the French advance against him. Did it? For this curious story bordering on disobedience to orders see: http://campaignsingermania.blogspot.com/2012/05/part-1-battle-of-costa-blanca.html
Lt. Colonel Charles Gordon (Jim P. Der Alte Fritz) was the overall commander in the center and right. His mission was to hold Costa Blanca or if unable, fall back to the north.
 The 9th Foot marched into the battlefield center pushing back a screen of Chasseurs A Cheval. The red coats were careful not to fire and waste a very potent first fire bonus on them.
 The reason? Large numbers of French infantry were known to be approaching the battlefield. They are shown here as the Chasseurs A Cheval depart.


 Soon give fire upon the advancing foe. French strength exceeded that of the British locally by 50%. Given events on the right flank, the 9th would soon began to withdraw.
 Jim's new Polish Lancers with French infantry nearby have pushed back the British. Note Hacienda Robles on the French Back Table in the upper left of the image. Stan G. defended that position with some of his British collection. Unfortunately I do not have photos of this.
 At the top of the image a French cavalry regiment appears to have penetrated into Costa Blanca threatening the British hold on the village.
 Lt. Col. Charles Gordon's 83rd Foot did the best it could but the British were forced to withdraw to their Back Table.
----------
Closing Remarks
1. Units are 25-28mms based on a 1:10 ratio of miniatures to real men. Castings are based individually facilitating flexible ratios, formation changes and casualty removal. No rosters are needed. Magnetics are used with underlying movement trays.
2. Prodigious and sincere thanks to Jim P. Der Alte Fritz, Curt B., Earl K. and Stan G. who participated with distinction in the two games.
3. Jim, Curt and Stan added their collections to mine to make the two games played an extremely colorful ensemble of Old School gaming with modern accents to make game play faster and more efficient. The morning and afternoon games consumed roughly two and three hours to play respectively.
4. By our usual quitting time of the turn in progress at 4:30pm, the British were in full retreat off the Main Table onto their Back Table. Though a French victory was certain half way through the afternoon, the dynamic of a fighting withdrawal was the idea. Delay the French as long as possible and hope for some event to discombobulate them. The last card the British had to play was the arrival of the 16th Light Dragoons into central reserve on our Back Table. At 4:30 they were ready to charge onto the Main Table to disrupt French cavalry threatening the withdrawal of the 83rd. Foot. This could have bought more time but the outcome would not have changed. Alas we then decided to conclude, have a companionable chat and pack up.
5. Curt and Earl's French battle plan called for a heavy push in the center with lighter pressure on the flanks. It was a good plan with success everywhere for them.
6. The 9th. 16th., 83rd. and all rifles on the left flank are castings from Elite Miniatures. A lot of the French are Dixon and Old Glory. Many thanks to Jeff C. who mailed the Portuguese to participate!
7. To paraphrase the Duke of Wellington about Waterloo, "They came at us in the same old way." What he meant was in columns. In Spain the French used columns designed to shock their foe whilst the British used lines to shoot them down. Most in our group do Seven Years' War a lot. Columns to us are a horror. Lines are the thing - the only thing 99% of the time. Thus, at game end, it dawned on us we might need extra provisions to encourage use of French columns.
8. Rules: Batailles de l'Ancien Régime 1740-1763 adapted to Napoleonics. Our play tests go back about three years with 1-2 games annually. We hope to have another game very soon. Indeed, Der Alte has already commenced his next battalion, Curt is talking about more cavalry for himself and I have the 5th Foot waiting for my brushes after August. Tally-Ho!
9. Thank you for looking in. Your comments as always are very welcome below.
--------
Location: Costa Blanca, Iberia
Situation: Game #2 French Army Arrives
The previous posting described portions of Game #1, a reconnaissance game. See:
http://campaignsingermania.blogspot.com/2012/05/part-2-battle-of-costa-blanca.html
----------
Britannian Left Flank
General Paget commanded the red coat left flank. His mission was to delay the French advance for as long as possible and later fall back to Costa Blanca or to the northwest.

Portuguese (left) and British (right) Rifles
fire on two French battalions.

To their right the Royal Marines stand fast
as more French approach.
The 16th Light Dragoons are....

Withdrawing to Costa Blanca covered by more Rifles.
The odds are....

Too great for the British.
Three French battalions (left) inexorably advance
covered by a cloud of skirmishers.

All British will retreat to their "Back Table"
in a fighting withdrawal.


General Paget did have one hand to play. During the above action, his 15th Hussars managed to ride from the extreme left, (on a Side Table) then turn right and penetrate deeply into the French rear. He hoped this would discombobulate the French advance against him. Did it? For this curious story bordering on disobedience to orders see: http://campaignsingermania.blogspot.com/2012/05/part-1-battle-of-costa-blanca.html
Britannian Center
Lt. Colonel Charles Gordon (Jim P. Der Alte Fritz) was the overall commander in the center and right. His mission was to hold Costa Blanca or if unable, fall back to the north.


The 9th has it's work cut out for it.
The battalion has a small reserve and it's....

Light company has deployed in cover along the river bank to....

Britannian Right Flank


----------
Closing Remarks
1. Units are 25-28mms based on a 1:10 ratio of miniatures to real men. Castings are based individually facilitating flexible ratios, formation changes and casualty removal. No rosters are needed. Magnetics are used with underlying movement trays.
2. Prodigious and sincere thanks to Jim P. Der Alte Fritz, Curt B., Earl K. and Stan G. who participated with distinction in the two games.
3. Jim, Curt and Stan added their collections to mine to make the two games played an extremely colorful ensemble of Old School gaming with modern accents to make game play faster and more efficient. The morning and afternoon games consumed roughly two and three hours to play respectively.
4. By our usual quitting time of the turn in progress at 4:30pm, the British were in full retreat off the Main Table onto their Back Table. Though a French victory was certain half way through the afternoon, the dynamic of a fighting withdrawal was the idea. Delay the French as long as possible and hope for some event to discombobulate them. The last card the British had to play was the arrival of the 16th Light Dragoons into central reserve on our Back Table. At 4:30 they were ready to charge onto the Main Table to disrupt French cavalry threatening the withdrawal of the 83rd. Foot. This could have bought more time but the outcome would not have changed. Alas we then decided to conclude, have a companionable chat and pack up.
5. Curt and Earl's French battle plan called for a heavy push in the center with lighter pressure on the flanks. It was a good plan with success everywhere for them.
6. The 9th. 16th., 83rd. and all rifles on the left flank are castings from Elite Miniatures. A lot of the French are Dixon and Old Glory. Many thanks to Jeff C. who mailed the Portuguese to participate!
7. To paraphrase the Duke of Wellington about Waterloo, "They came at us in the same old way." What he meant was in columns. In Spain the French used columns designed to shock their foe whilst the British used lines to shoot them down. Most in our group do Seven Years' War a lot. Columns to us are a horror. Lines are the thing - the only thing 99% of the time. Thus, at game end, it dawned on us we might need extra provisions to encourage use of French columns.
8. Rules: Batailles de l'Ancien Régime 1740-1763 adapted to Napoleonics. Our play tests go back about three years with 1-2 games annually. We hope to have another game very soon. Indeed, Der Alte has already commenced his next battalion, Curt is talking about more cavalry for himself and I have the 5th Foot waiting for my brushes after August. Tally-Ho!
9. Thank you for looking in. Your comments as always are very welcome below.
--------
Subscribe to:
Posts (Atom)